

Smart list headings
Smart list headings allow you to make changes on a complete list instead of on each single task. By using this functionality, you can reduce the length of the lists and make the comprehensible. It is easy to re-use information, for example email the project list to a colleague or create different versions of your check lists.
Set properties on the complete list
In SaveYourDay, a task is the same thing as a list and vice versa. It is therefore possible to set exactly the same properties for the list heading as for each single task in the list.
The advantage to set a date on the complete list is that you only have one single place to change in case a change of date occurs. Thanks to the smart list headings, the complete list is shown in the overviews when it is time to start up or close out the project. You can of course go in and give a task a start or completion date that deviates from the complete list dates.
List heading quick menu
In addition to the above, every list heading has a qucik menu . with a number of other smart solutions. You can for example:
- Copy the list and create different versions for similar processes.
- Email all tasks belonging to a certain tag
 to a receiver of your choice.
 - Mark all tasks in a list complete at once.
- Move the complete list to the trash bin.
 Tip!
Tip!
If you want that a specific list, context view or tag view always shall be visible in the view “Today”, change property to “Urgent” by clicking the edit icon  .
.
Edit properties
Hold the mouse pointer on top of the list heading and click on the edit icon . Set start date, deadlines and all other properties as usual.
Example
Set date on a complete list
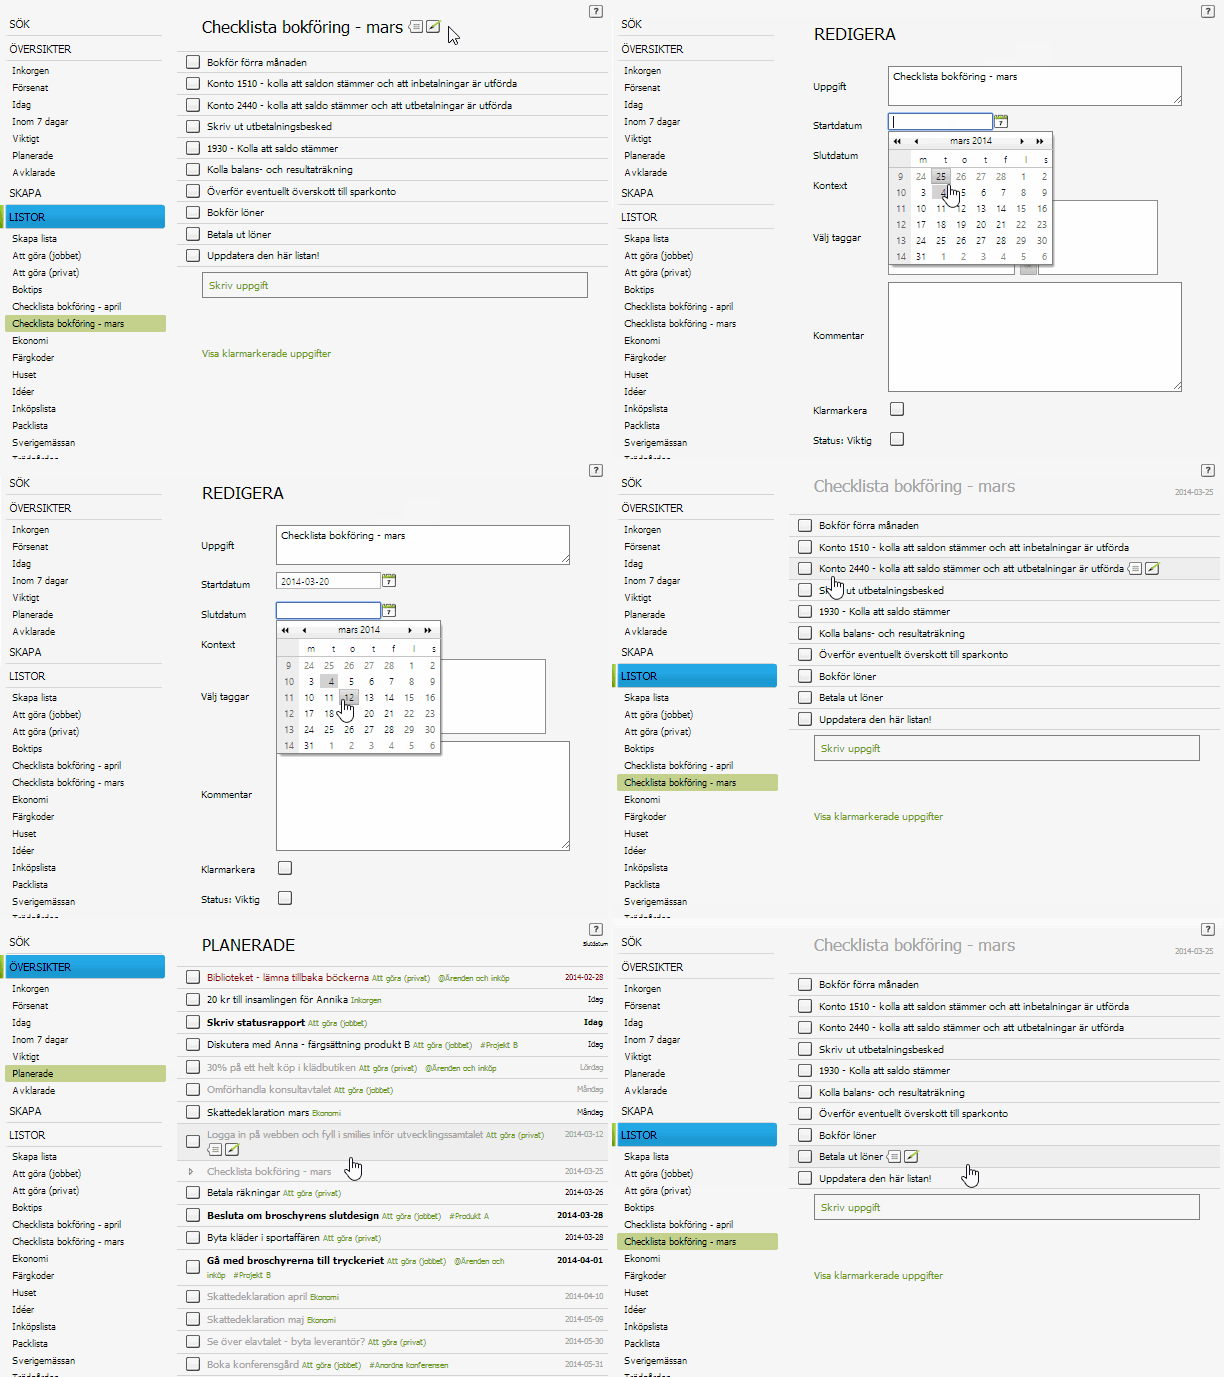
Anton has created a check list for the month end bookkeeping. The list is named “Check list month end – March”. Every task shall be completed within the period from March 20-25. Anton sets both a start date of March 20 and a deadline of March 25. The complete list now is visible in the different overviews, for example “Planned”.
Smart list headings is an excellent tool if you use different lists for different projects. One way of managing the urgency and importance is to set start dates and deadlines.
Example
Packing list shows in ”Within 7 days”
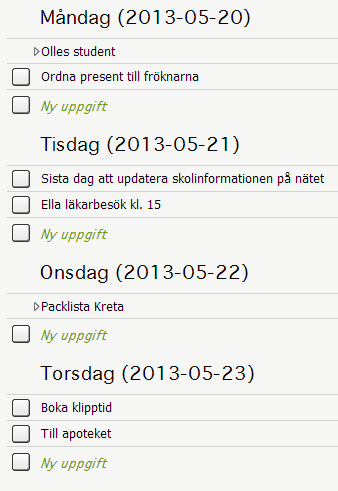
In the example below, both the list ”Olles student” and ”Packlista Kreta” (marked with a small arrow) are shown in the view ”Within 7 days”.
Example
Set the context @Shopping on a complete list
You can write your shopping list as a normal list and then add the context ”Shopping” to the complete list. Then your complete shopping list is included in the tag “Shopping” together with all other shopping items you have defined in other lists. You can reorder the contents within the context view.
Example
Set tags on a complete list
Sometimes it is useful to have tasks from several lists showing in one view. Then create a tag, tag all lists you want to see at the same time and go to the tag view.